
How to Make Virgin Coconut Oil at Home
In today’s wellness-oriented world, the spotlight is on natural products, and one that stands out is virgin coconut oil. Its versatility in promoting health, enhancing beauty, and elevating culinary experiences has made it a household staple. In this article, we will delve into various aspects providing you with a comprehensive guide on ways to make virgin coconut oil at home.
Benefits of Virgin Coconut Oil
Hair Care Benefits
Virgin coconut oil serves as a nourishing elixir for your hair. Its ability to penetrate the hair shaft strengthens and moisturizes, reducing breakage and split ends.
Skin Care Advantages
When it comes to skincare, the natural goodness of virgin coconut oil shines. It acts as a potent moisturizer, leaving the skin supple and radiant. Its antimicrobial properties also make it an excellent choice for addressing various skin issues.
Health Benefits When Consumed
Internally, virgin coconut oil boasts health benefits. From boosting metabolism to supporting the immune system, its consumption is a holistic approach to well-being.
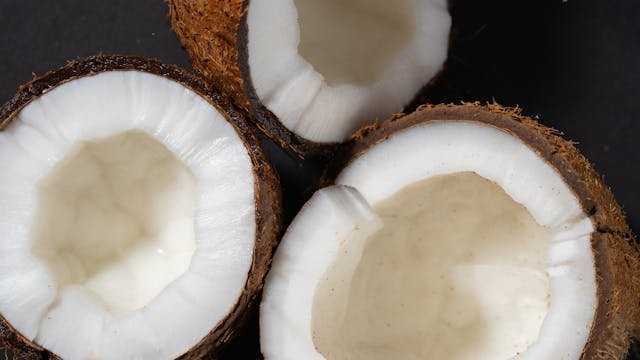
Choosing the Right Coconuts
Choosing the right coconuts is crucial for making high-quality virgin coconut oil at home. Here are some tips to help you select the best coconuts:
Color and Texture: Look for coconuts with a rich, brown outer husk. The husk should feel firm and not too soft. Avoid coconuts with mold, cracks, or any signs of damage.
Weight: Choose coconuts that feel heavy for their size. Heavier coconuts often have more water content, which is important for extracting oil.
Sound: Shake the coconut and listen for the sound of water sloshing inside. A good coconut will have a noticeable amount of water, indicating freshness.
Eyes and Stem: Check the three “eyes” (indentations) at the base of the coconut. The eyes should be clean, without any mold or unusual discoloration. Also, inspect the stem end; it should not be moldy or have a foul odor.
Smell: A fresh coconut should have a mild, sweet coconut aroma. If it has a sour or fermented smell, it may be overripe or spoiled.
Origin: If possible, choose coconuts from reliable sources or regions known for producing high-quality coconuts. This can impact the overall flavor and quality of your virgin coconut oil.
Organic vs. Conventional: Consider opting for organic coconuts to minimize the risk of pesticide residues in your homemade virgin coconut oil.
Variety: Different coconut varieties may have slightly different flavors and aromas. Experiment with different varieties to find the one that suits your taste preferences.
Once you’ve selected the right coconuts, follow one of the following virgin coconut oil extraction methods to ensure the best results at home!
1. DIY Wet Mill Method at Home
Making your coconut oil at home through the wet mill method is a rewarding and fulfilling experience. Not only does it allow you to enjoy the benefits of fresh, homemade coconut oil, but it also connects you with the rich tradition of coconut processing.
Ingredients and Tools
Before you start, gather the following:
- Fresh coconuts
- Knife
- Grater or food processor
- Blender or mixer
- Cheesecloth or a fine mesh strainer
- Water
Step-by-Step Process
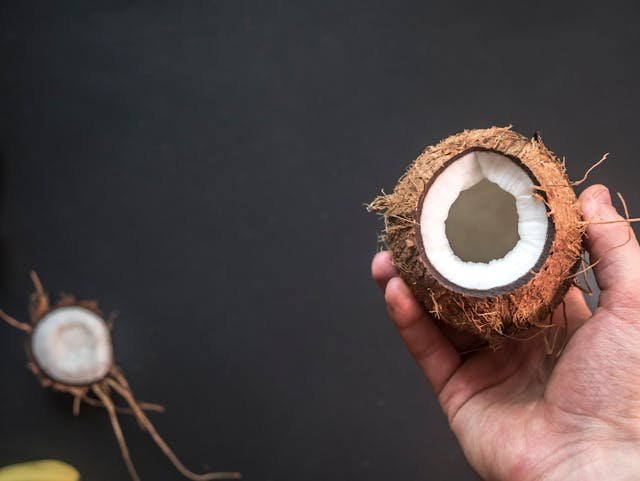
1. Selecting and Husking Coconuts
Choose ripe coconuts with a firm shell. Using a knife, carefully husk the coconuts to reveal the white kernel inside.
2. Grating the Coconut
Using a grater or food processor, grate the coconut flesh. Aim for fine particles to ease the extraction process.
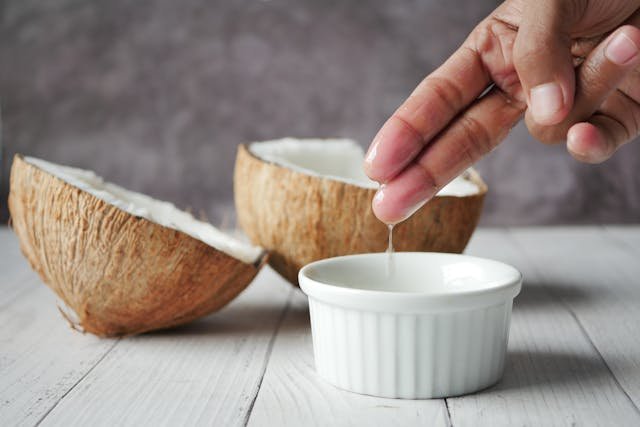
3. Extracting Coconut Milk
Transfer the grated coconut to a blender or mixer. Add water and blend until you achieve a thick, milky consistency. This is your coconut milk.
4. Pressing the Coconut Milk
Place the coconut milk in a cheesecloth or fine mesh strainer over a bowl. Squeeze or press to extract the liquid. This liquid is a combination of water and coconut oil.
5. Allowing Separation
Let the extracted liquid sit for some time to allow natural separation. The coconut oil will rise to the top while the water settles at the bottom.
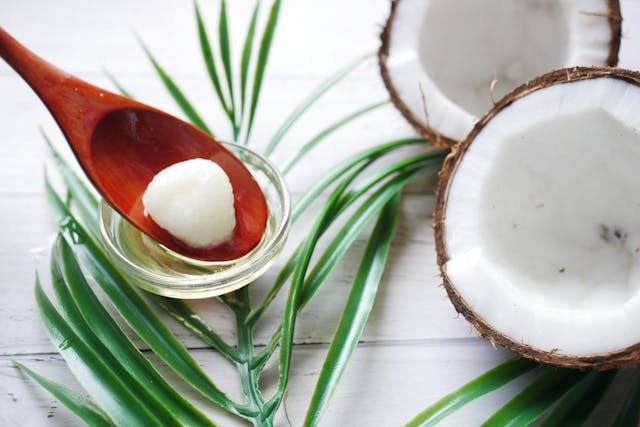
6. Collecting the Coconut Oil
Carefully skim off the coconut oil from the top using a spoon or ladle. Be cautious not to include any water in this process.
7. Filtering for Purity
For an extra level of purity, pass the collected oil through a fine filter or cheesecloth to remove any remaining impurities.
8. Storing the Homemade Coconut Oil
Transfer your freshly extracted coconut oil into a clean, airtight container. Store it in a cool, dark place to maintain its freshness.
Advantages of DIY Wet Mill Method at Home
1. Control Over Ingredients
Making coconut oil at home allows you to control the quality of ingredients, ensuring a pure and natural product.
2. Freshness Guaranteed
With the DIY method, you’re guaranteed the freshest coconut oil possible, devoid of any preservatives or additives.
3. Cost-Effective
Homemade coconut oil is often more cost-effective than store-bought options, especially if you have a ready supply of coconuts.
2. Cold Process Method for Making Coconut Oil at Home
This is a gentle and natural approach that preserves the nutritional integrity of the coconut. By avoiding heat, this method ensures that the oil retains its full range of benefits.
Ingredients and Tools
Before you begin, gather the following:
- Fresh coconuts
- Knife
- Grater or food processor
- Blender or mixer
- Cheesecloth or a fine mesh strainer
- Water
Step-by-Step Process
1. Selecting Fresh Coconuts
Opt for ripe coconuts with a firm texture. Ripe coconuts contain a higher oil content, enhancing the quality of your final product.
2. Husking the Coconuts
Carefully husk the coconuts using a knife, revealing the white coconut kernel inside.
3. Grating the Coconut
Using a grater or food processor, grate the coconut flesh into fine particles. This aids in the extraction process.
4. Extracting Coconut Milk
Transfer the grated coconut into a blender or mixer, adding water. Blend until you achieve a thick, milky consistency – your coconut milk.
5. Straining the Coconut Milk
Place the coconut milk in a cheesecloth or fine mesh strainer over a bowl. Squeeze or press to extract the liquid, separating the water from the coconut cream.
6. Allowing Natural Separation
Let the coconut cream sit undisturbed. Over time, natural separation occurs, with the coconut oil rising to the top and the water settling at the bottom.
7. Collecting the Coconut Oil
Carefully skim off the coconut oil from the top using a spoon or ladle. Be meticulous to avoid any water in this process.
8. Filtering for Clarity
For a crystal-clear final product, pass the collected oil through a fine filter or cheesecloth to remove any remaining impurities.
9. Storing the Cold-Processed Coconut Oil
Transfer your freshly extracted coconut oil into a clean, airtight container. Store it in a cool, dark place to maintain its freshness.
Advantages of Cold Process Method at Home
1. Retained Nutrient Content
The cold process method preserves the maximum nutrient content of the coconut oil, ensuring a more potent and healthful product.
2. Delicate Flavor and Aroma
By avoiding heat, the cold process method maintains the natural flavor and aroma of the coconut, enhancing its culinary applications.
3. Enhanced Shelf Life
Cold-processed coconut oil tends to have a longer shelf life compared to some heat-processed alternatives, thanks to the gentle extraction process.
3. Boiling Method for Crafting Coconut Oil at Home
The boiling method for making coconut oil at home brings simplicity to the extraction process, utilizing heat to separate the oil from coconut milk. This method is accessible and convenient, offering a quick way to produce coconut oil in your kitchen.
Ingredients and Tools
Before you begin, gather the following:
- Fresh coconuts
- Knife
- Grater or food processor
- Blender or mixer
- Water
Step-by-Step Process
1. Selecting Fresh Coconuts
Choose ripe coconuts with a firm texture. Ripe coconuts ensure a higher oil content and a more flavorful end product.
2. Husking the Coconuts
Using a knife, carefully husk the coconuts to expose the white kernel inside.
3. Grating the Coconut
Grate the coconut flesh into fine particles using a grater or food processor. This aids in the extraction process.
4. Extracting Coconut Milk
Transfer the grated coconut into a blender or mixer, adding water. Blend until you achieve a thick, milky consistency – your coconut milk.
5. Boiling the Coconut Milk
Pour the coconut milk into a pot and bring it to a gentle boil. Stir occasionally to prevent the milk from sticking to the bottom.
6. Simmering and Separation
Reduce the heat to a simmer once the coconut milk reaches a boil. Allow it to simmer, stirring occasionally, until the coconut oil starts separating from the milk. This process may take some time.
7. Collecting the Coconut Oil
Once you notice a clear separation of coconut oil on the surface, carefully skim off the oil using a spoon or ladle.
8. Filtering for Purity
For a clearer and purer final product, pass the collected oil through a fine filter or cheesecloth to remove any remaining impurities.
9. Storing the Boiled Coconut Oil
Transfer your freshly extracted coconut oil into a clean, airtight container. Store it in a cool, dark place to maintain its freshness.
Advantages of Boiling Method at Home
1. Quick and Convenient
The boiling method is a faster alternative, providing you with homemade coconut oil in a relatively shorter time compared to some other methods.
2. Practical for Small Batches
This method is practical for producing smaller batches of coconut oil at home, making it suitable for personal use.
3. Minimal Equipment Required
You only need basic kitchen tools for the boiling method, making it accessible for those without specialized equipment.
How to store virgin coconut oil at home?
To store homemade virgin coconut oil, place it in a cool, dark spot away from direct sunlight and heat, using an airtight container to shield it from air and moisture. Ensure the storage area is dry and free from temperature fluctuations. If possible, opt for dark glass or opaque containers to protect the oil from light exposure. Regularly check for signs of spoilage like mold, off smells, or discoloration. Refrigeration is optional, especially in warmer climates. Use clean utensils to avoid contamination. For more detailed storage methods, please visit our webpage dedicated to storing virgin coconut oil.