
A Guide To Using a Color Matching Kit to Dye Your Leather
Leather jackets, handbags, boots – these timeless fashion staples add a touch of cool sophistication to any outfit. But sometimes, that perfect piece suffers from nicks, scratches, or faded color. Fear not, fashion friends! Enter the color matching kit, your secret weapon for transforming tired leather back into a bold statement piece.
what are Color Matching Kits?
Unlike picking a single dye color and hoping for the best, color matching kits offer a more precise approach. These kits are essentially mini-dye studios in a box, allowing you to mix and match pre-measured dye concentrates to achieve the perfect shade. This empowers you to restore your leather’s original glory, or even create a whole new look with a touch of personalized flair!
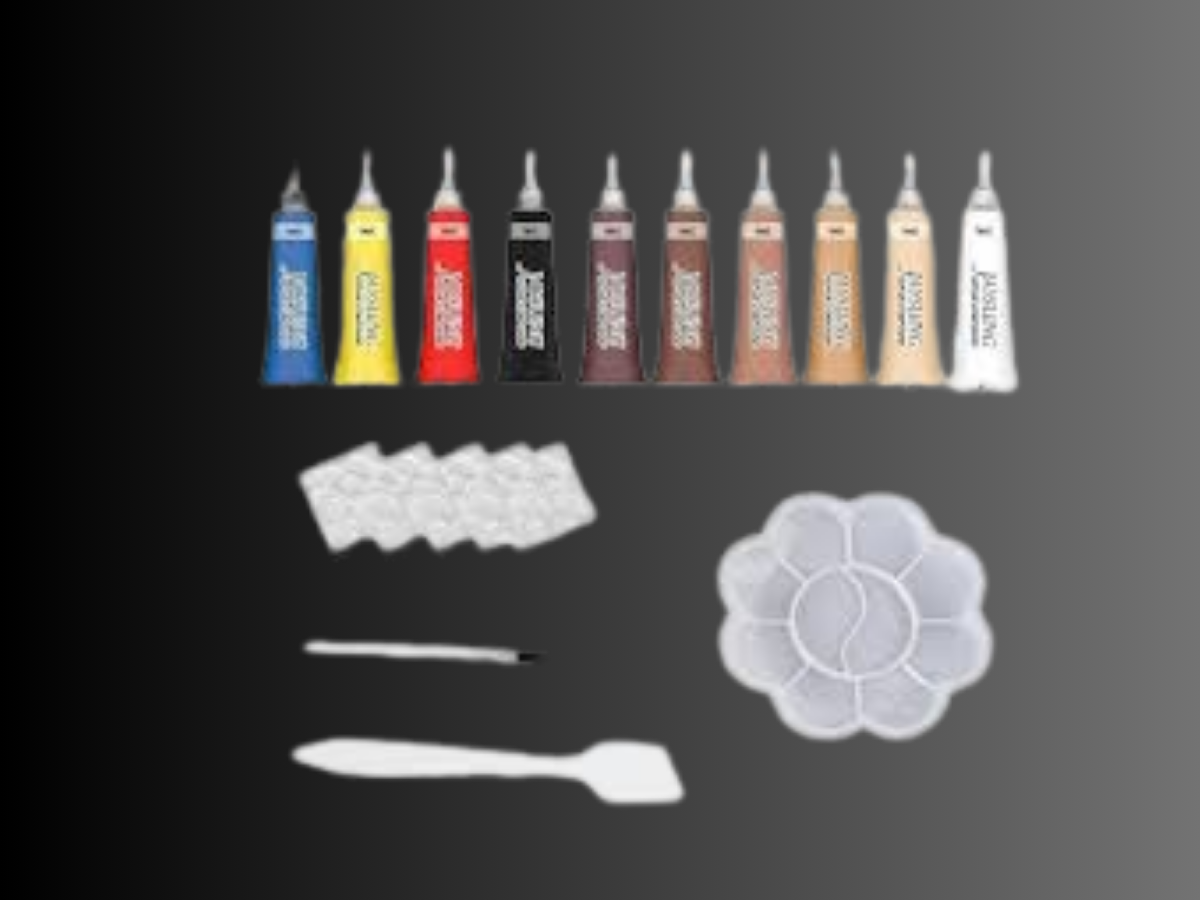
What is Inside A Color Matching Kit?
The contents of a color matching kit can vary depending on the brand, but generally include these essential components:
Dye Concentrates
The heart of the kit comes in small bottles containing highly pigmented dyes. The selection typically includes primary colors (red, yellow, blue) and secondary colors (orange, green, purple) – the building blocks for a range of color combinations.
Mixing Chart or Guide
This is your roadmap to color alchemy! The chart acts as a decoder ring, translating ratios of dye concentrates into specific colors. It provides a starting point for mixing and allows you to experiment to achieve the perfect match.
Leather Deglazer (Optional)
This can be a double-edged sword. While it removes existing finishes or dyes from the leather, allowing the new dye to adhere better, it’s important to use it with caution. Deglazers can be quite potent, so a test spot on a hidden area is crucial before applying it to the entire piece.
Leather Conditioner
As the name suggests, this is vital for post-dyeing care. The dyeing process can strip away some of the leather’s natural oils, so conditioner replenishes them, keeping your leather supple and preventing cracks.
Applicator Tools
These are the instruments that will translate your color-matching magic onto your leather project. The kit might include:
1. Mixing Cups: Small, disposable cups for holding and combining your dye concentrates.
2. Stirrers: These come in handy for thoroughly mixing the dyes to achieve a uniform color.
3. Dye Applicator Brushes: High-quality, fine-tipped brushes specifically designed for applying dye to leather. These ensure precise application and minimize the risk of dye bleeding or splotches.
4. Sponges (Optional): Some kits might include sponges for larger areas. However, for most leather projects, brushes offer better control for detailed work.
Remember, a little goes a long way with dye concentrates! These are highly pigmented, so start with small amounts and gradually add more until you reach your desired shade.
How To Use Color Matching Kit To Dye Leather
Here’s your step-by-step guide to using a color-matching kit to dye your leather like a pro:
Gather Your Supplies
Assemble your color-matching kit, leather cleaner, conditioner, safety gear like gloves (recommended), and any drop cloths to protect your workspace.
Clean the Leather
Thoroughly clean the leather item using a leather cleaner to remove dirt, grime, and any finishes that might hinder dye absorption.
Identify the Original Color (Optional)
If possible, try to identify the original color of the leather from a hidden tag or inside seam. This can be a starting point for mixing your dye.
Consult the Mixing Chart
Refer to the chart provided with your kit to understand how to combine dye concentrates to achieve different colors.
Start Small, Experiment Wisely
Begin with a small amount of each dye concentrate based on the mixing chart’s recommendations. Remember, you can always add more dye, but removing too much is nearly impossible.
Test, Test, Test!
This cannot be stressed enough! Always test your mixed dye on a small, inconspicuous area of the leather, like an inside seam. This allows you to assess the color match and identify any potential issues before dyeing the entire item.
Apply the Dye
Using your dye applicator brush, carefully apply the dye to the leather in thin, even coats. Work in sections and allow each coat to dry completely before adding another.
Building Up Color
Applying multiple thin coats is key for a more even and lasting color compared to one thick coat. This allows each layer to dry thoroughly and prevents the dye from pooling or bleeding.
Achieving Uniformity
For larger items, work in sections to ensure consistent color application. You can use blending techniques to create a more natural look, especially when trying to match a faded or worn area.
Finishing Touches
- Let it Dry: Allow the dyed leather to dry completely according to the manufacturer’s instructions. This can take several hours.
- Conditioning is Crucial: Once dry, apply a leather conditioner to replenish lost oils and maintain the suppleness of the leather. Buff the leather gently with a soft cloth to remove any excess conditioner.
Safety First
- Work in a Well-Ventilated Area: Dyes can have strong fumes. Open windows or use a fan to ensure proper ventilation.
- Wear Gloves: Protect your hands from dye stains by wearing gloves while mixing and applying the dye.
- Clean Up Spills Immediately: Spilled dye can stain surfaces. Act quickly to clean up spills with a damp cloth.
Beyond Matching
Color matching kits aren’t just for replicating existing colors. With a bit of creativity, you can mix and match dyes to create unique, custom shades for a personalized touch to your leather items.
The Takeaway
By using a color-matching kit and following these steps, you can transform your tired leather pieces into vibrant fashion statements. Remember, a little color-matching magic can breathe new life into your leather wardrobe, allowing you to express your unique style with confidence!