
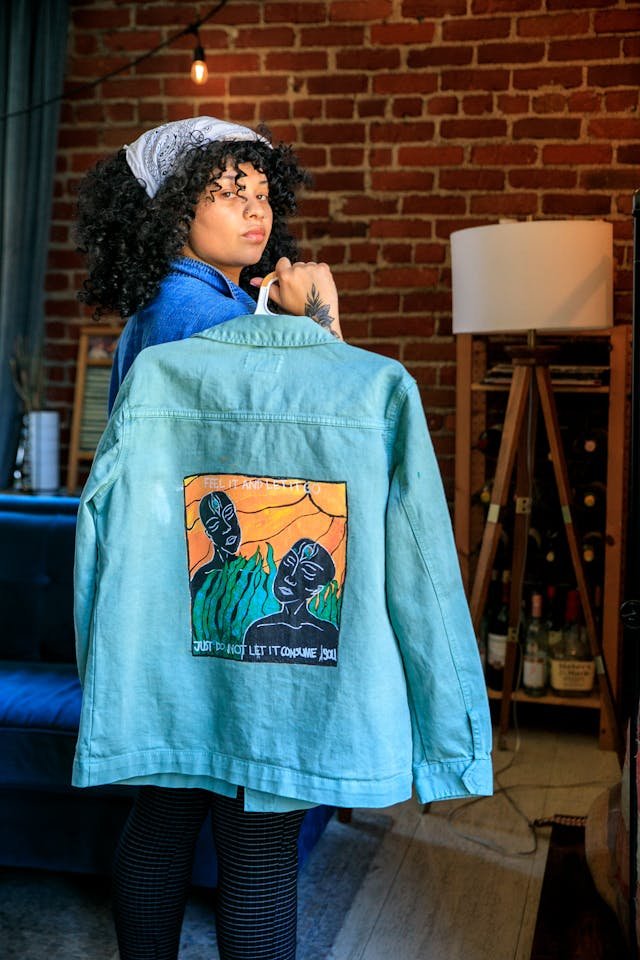
Painting a Vibrant Scene on Your Jacket Like A Pro
Jackets serve as more than just clothing items; they’re blank canvases yearning for personal expression. Painting a custom design on the back of your jacket provides an avenue to showcase your creativity and individuality. In this comprehensive guide, we’ll take you through an intricate, step-by-step process of creating a captivating scene featuring two black figures, a radiant sun, and lush grass, utilizing black, green, and orange fabric paint. We’ll delve into each step of a blog post on how to paint a jacket like a pro with meticulous detail, including techniques such as stenciling and hair drying, ensuring professional-grade results.
Materials Needed
- Jacket: The canvas for your artistic expression.
- Fabric paint in black, green, and orange: Vibrant colors to bring your design to life.
- Assorted paintbrushes: Tools for precise detailing and broad strokes alike.
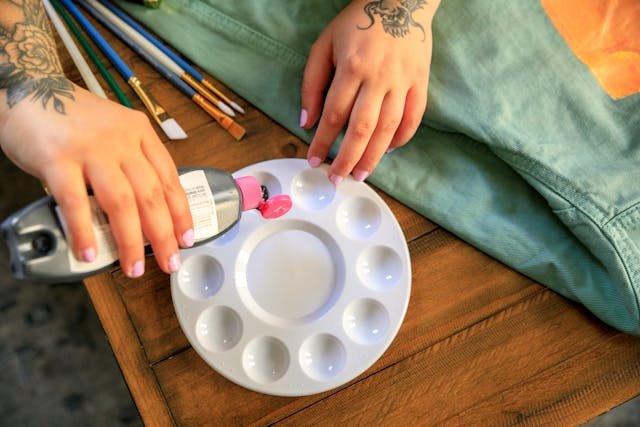
- Palette or disposable plate: For mixing and holding paint.
- Square stencil: A tool for creating precise shapes.
- Pencil or fabric marker: For sketching your design.
- Hair dryer: Speeds up the drying process between layers.
Step 1: Prepare Your Workspace
Creating art requires a conducive environment. Ensure your workspace is clean, well-lit, and flat, providing an optimal surface for your project. Lay your jacket flat, smoothing out any wrinkles or creases that could disrupt the painting process.
Step 2: Sketch and Stencil Your Design
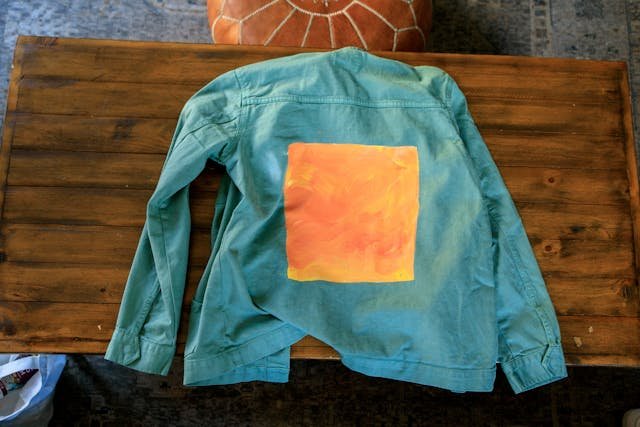
Before diving into the paint, utilize the square stencil to define the area for the sun. With precision, fill in the stencil using orange fabric paint, creating a vibrant square that will serve as the focal point of your composition. Let it dry or expedite drying time by employing a hair dryer on a low or medium setting.
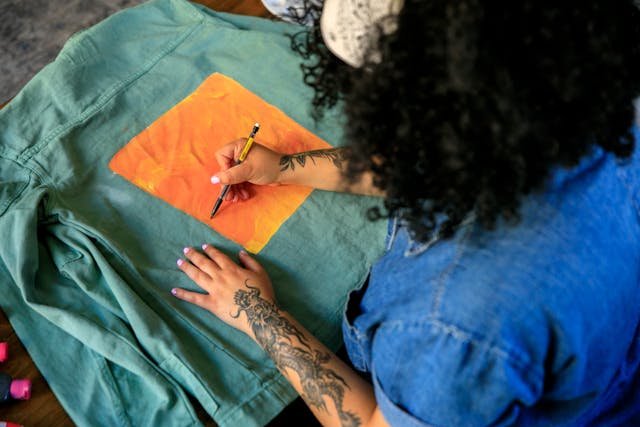
Next, sketch the outline of your design onto the orange square using a pencil or fabric marker.
Step 3: Adding Figures to the Design
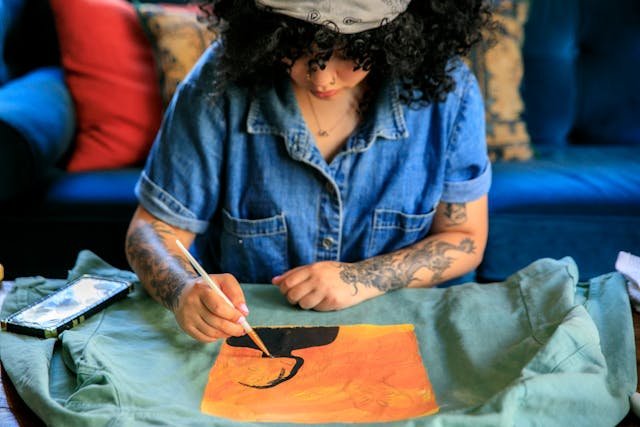
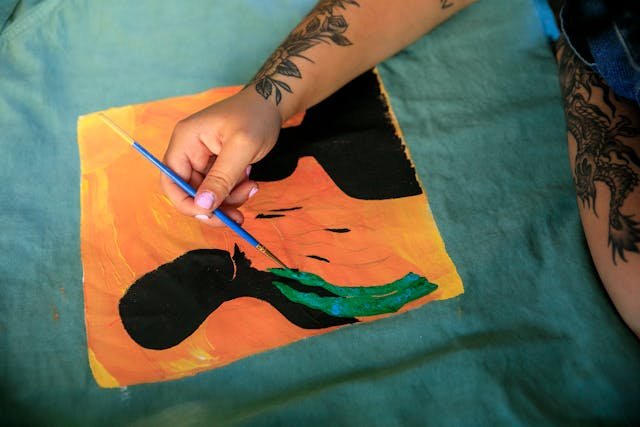
With the vibrant orange square serving as the sun’s backdrop, it’s time to introduce the central figures of your composition. Begin by using black fabric paint to outline and fill in the silhouette of the two figures.
- Start at the right corner of the orange square and carefully paint the outline of one figure. Consider the posture and positioning, ensuring it complements the overall composition. Then, using broad strokes, fill in the figure with black paint.
- Repeat the process for the second figure, positioning it at the left middle side of the square. Leave the space above the figures clear to maintain the prominence of the sun in your design.
- As you paint, pay attention to proportions and symmetry to create a balanced and visually appealing composition. Take your time to refine the details, adding depth and character to each figure.
- Once both figures are complete, allow the paint to dry thoroughly before proceeding to the next step. You can use a hair dryer on a low or medium setting to expedite the drying process, ensuring the paint sets evenly without smudging or smearing.
- With the figures in place, your design is beginning to take shape, setting the stage for further detailing and embellishment in the following steps.
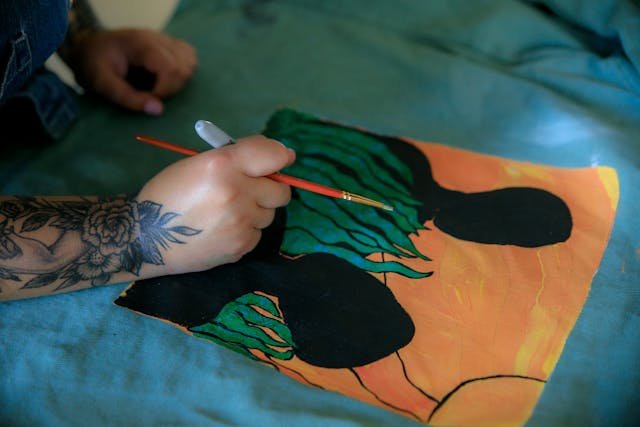
Step 4: Adding Grass Between the Figures
With the black figures established, it’s time to create the lush green grass that surrounds them. Using green fabric paint and a thin paintbrush, carefully draw blades of grass between the two figures, leaving spaces between them to accommodate the figure painted on the left middle side of the square.
- Start by painting thin, vertical strokes to represent individual blades of grass, varying the length and direction to mimic the natural growth pattern. Allow the grass to overlap slightly with the outlines of the figures, creating a seamless transition between the elements of your composition.
- As you paint, consider the perspective and positioning of the grass, ensuring it adds depth and dimension to the scene. Create clusters of grass closer to the figures and scatter smaller patches further away to create a sense of depth and realism.
- Be mindful of the spaces left between the blades of grass, as these will be filled with black fabric paint to define the figure on the left middle side of the square. Leave enough room to accommodate the outline and details of the figure while maintaining the integrity of the grassy landscape.
- Take your time to paint each blade of grass with precision and attention to detail, ensuring consistency in color and texture throughout the composition. Once the grass is complete, allow the paint to dry thoroughly before moving on to the next step.
- With the addition of the lush green grass, your composition begins to come to life, providing a vibrant backdrop for the central figures and setting the stage for further refinement and detailing in the subsequent steps.
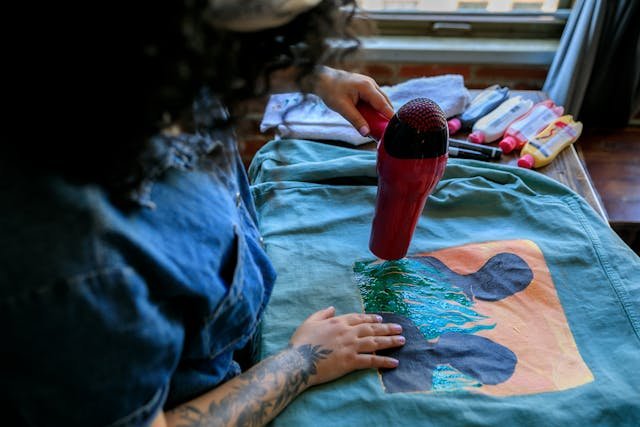
Step 5: Drying the Paint
Patience is paramount as you progress through the painting process. Expedite drying times between layers by employing a hair dryer on a low or medium setting, ensuring each layer is thoroughly dry before proceeding to the next step. Maintain a safe distance to prevent smudging or heat damage to your artwork.
Step 6: Adding Sun Rays
With the base layers dry and your grassy landscape complete, it’s time to add the radiant sun to your composition. Using a thin paintbrush and black fabric paint, carefully draw thin strokes to outline the rays of the sun, which sits on the upper right corner of the square.
Start by painting straight lines extending outward from the center of the sun, varying their lengths and angles to create a dynamic and natural-looking effect. Allow the rays to intersect with the edges of the orange square and extend toward the black figures, reaching out as if to embrace them.
Take your time to paint each ray with precision and care, ensuring smooth, even strokes and consistent spacing throughout the composition. Once the sun rays are complete, allow the paint to dry thoroughly before moving on to the next step.
With the addition of the radiant sun rays, your composition is infused with warmth and vitality, enhancing the overall atmosphere and bringing your denim jacket design one step closer to completion.
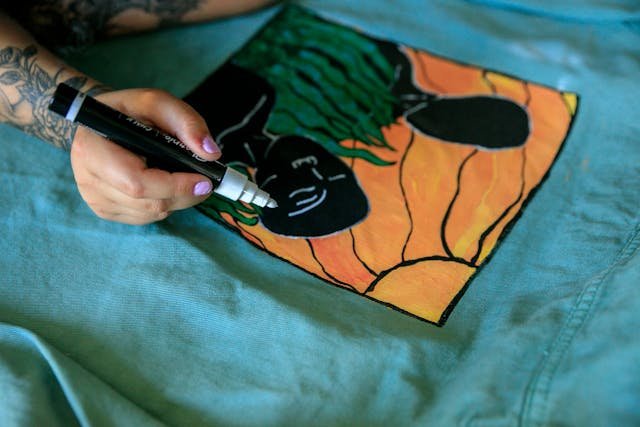
Step 7: Adding Details to the Figures
With the foundational elements of your composition in place, it’s time to breathe life into the figures by adding intricate details. Using a white-colored permanent marker, carefully draw the eyes, nose, and mouth of each figure.
- Start by outlining the eyes with gentle, curved strokes, paying attention to the shape and expression you want to convey. Add pupils to the eyes to bring them to life, using small dots or circles for a realistic appearance.
- Next, draw the noses of the figures, keeping the lines subtle and refined. Consider the angle and positioning of the noses in relation to the rest of the facial features, ensuring they complement the overall expression of the figures.
- Finally, add the mouths of the figures, using delicate lines to depict lips and subtle expressions. Consider the emotions you want to convey through the mouths, whether it’s a serene smile or a thoughtful expression.
- As you add these details, take your time to ensure precision and accuracy. Pay attention to the proportions and symmetry of the facial features, as they contribute to the overall realism and appeal of your design.
- Once the details are complete, allow the permanent marker ink to dry thoroughly before proceeding to the next step. This ensures that the details remain crisp and vibrant without smudging or fading over time.
With the addition of these intricate details, your figures come to life, conveying emotion and personality within your jacket design. Take pride in your craftsmanship and attention to detail, as each stroke contributes to the overall impact and beauty of your artwork.
Step 8: Finalizing Your Masterpiece
Congratulations! With the intricate details added to your figures, your denim jacket design is now complete. Take a moment to step back and admire your work, appreciating the creativity and craftsmanship that went into bringing your vision to life.
As you review your masterpiece, ensure that all elements are precisely executed and harmoniously balanced. Check for any areas that may require touch-ups or refinement, making any necessary adjustments to achieve the desired result.
Once you are satisfied with the final composition, allow the fabric paint and permanent marker ink to dry completely. This ensures that your artwork remains vibrant and durable, ready to withstand the test of time.
As a finishing touch, consider adding your signature or a personal touch to the design, marking it as uniquely yours. Whether it’s a small initial or a meaningful symbol, this final detail adds a special touch of authenticity to your jacket masterpiece.
Now that your artwork is complete, wear your custom-designed jacket with pride, knowing that it reflects your creativity, passion, and individuality. Whether you’re strolling down the street or attending a social gathering, your wearable work of art is sure to turn heads and spark conversations.
Enjoy the process of creating and wearing your one-of-a-kind denim jacket, and don’t be afraid to let your imagination soar with future artistic endeavors. After all, the canvas is limitless, and the possibilities are endless.
Expert Tips to Avoid Mishaps
- Choose the Right Fabric Paint: Ensure you’re using high-quality fabric paint specifically designed for jacket fabric. This will ensure better adhesion and longevity of your design.
- Test Your Paints: Before starting your project, test the fabric paints on a small, inconspicuous area of the jacket to ensure they adhere well and achieve the desired effect.
- Use Light Layers: Instead of applying heavy coats of paint, build up your design with light layers. This prevents the paint from becoming too thick and stiff, maintaining the flexibility of the denim fabric.
- Prep Your Surface: Clean the surface of the jacket thoroughly before painting to remove any dirt, oil, or residue that could interfere with paint adhesion.
- Secure Your Stencil: When using stencils, secure them firmly to prevent paint from seeping underneath and creating blurry edges. Painter’s tape or adhesive spray can help keep the stencil in place.
- Practice Blending: If blending colors, practice on a separate surface to get the hang of mixing and blending techniques before applying them to your jacket.
By following these pro tips, you can avoid common mishaps and achieve professional-looking results when painting your jacket. So, roll up your sleeves, unleash your creativity, and transform your denim jacket into a wearable masterpiece!