
How to Draw a Bird? (A complete guide)
Birds are a group of warm-blooded vertebrates of the class Aves. Many species can also run, jump, swim, and dive. They dwell worldwide and in all habitats; the largest is the nine-foot-tall ostrich, and the smallest is the two-inch-long beak hummingbird. To draw a bird convincingly, it’s a good idea to become familiar with their basic anatomy. The external characteristics of all birds are the same and include
- Head
- Two eyes on either side of the head
- A beak with no teeth
- Wings
- Tail
- Legs and claws
Birds do not have a nose as mammals do. Two small dots on the beak serve as their respiratory openings. Now let’s learn how to draw them one by one.
Draw a Bird
Use a pencil for your drawing because it’s going to be a guide for you to keep the shape and perspective looking good. Follow these basic rules that’ll Improve Your Pencil Sketches
- Get the right setup
- Break subjects down into shapes and practice drawing them
- Draw what you see, not what you know
- Try sketching upside down
- Draw the negative space
Let’s get Started!
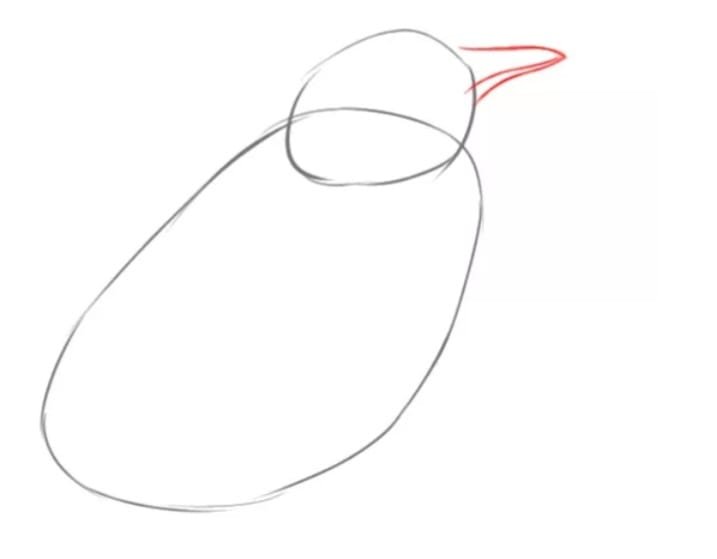
Step 1: Draw a basic framework
For the first step in this guide on how to draw a bird, draw two ovals, one small and the other significant. Both ovals overlap each other, as shown in the picture. They will provide the framework of the drawing. One considers the head, and the other is assessed as the body.

Step 2: Draw a beak
Now time to make a beak; draws an uneven triangle considered as a beak. Look at the picture below and divide the three-cornered shape into two parts, supposed mouth opening.
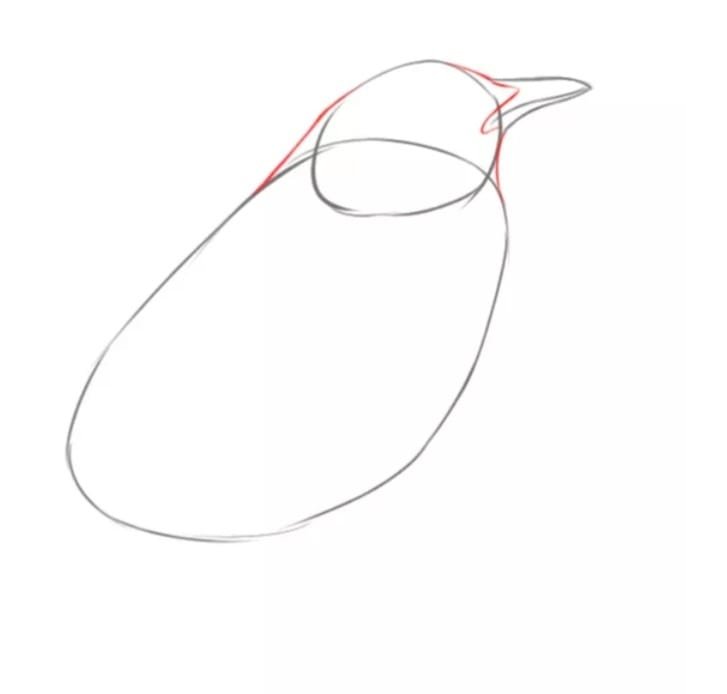
Step 3: Make a connection between the head and body
Now draw two concise lines, connect the head with the neck, that separate the head from the beak, as shown in the picture.
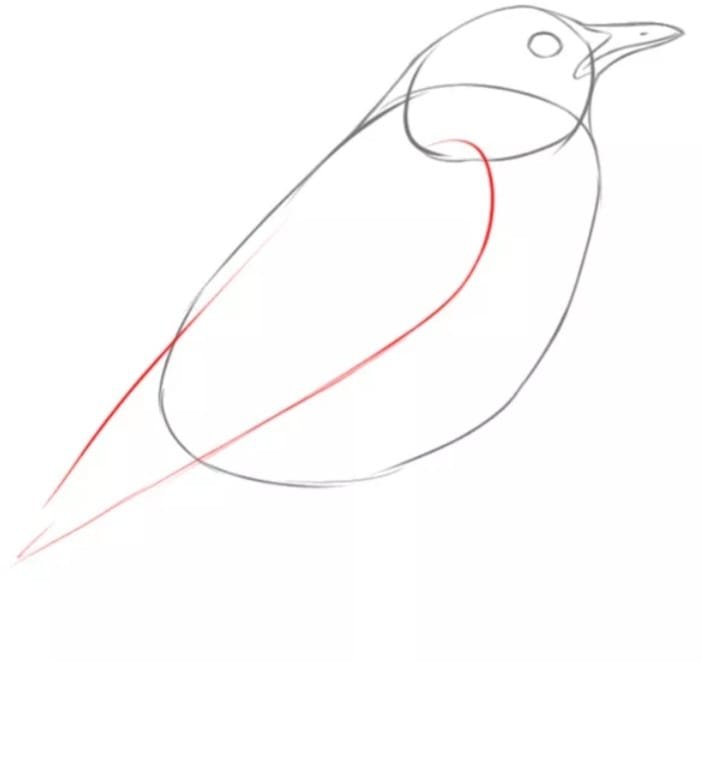
Step 4: Draw circles for the eye and nostrils
Refine the drawing by justifying one small circle depicted as the eye and a small dot on the beak as a bird’s nostril.

Step 5: Draw a wing
In this step, we draw a wing by drawing a pair of long lines, as shown in the pic.
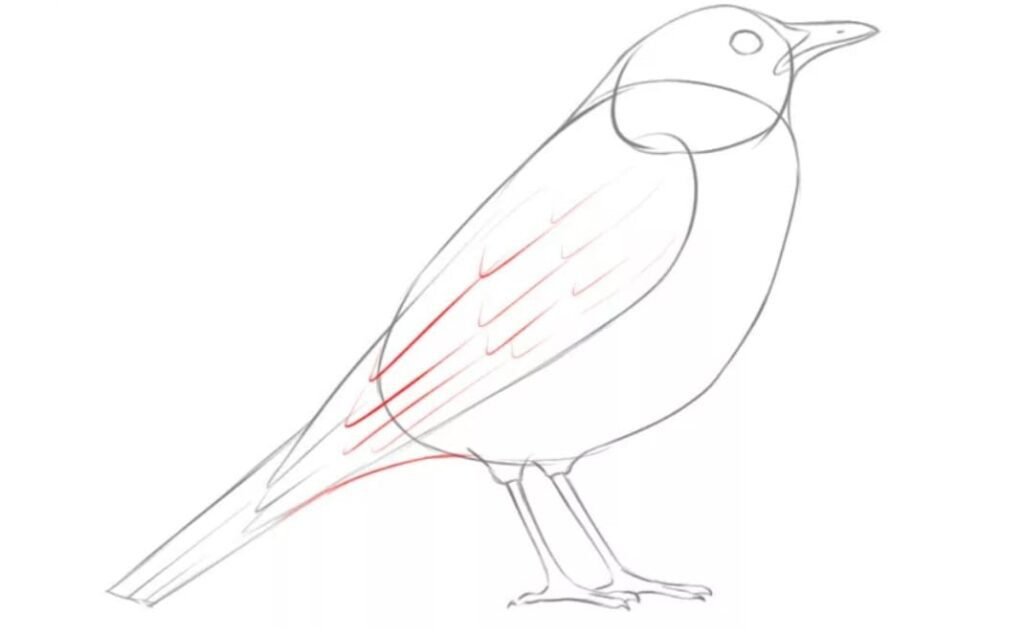
Step 6: Draw a tail
Draw a few lines considered as the tip of the wings as shown in the pic. Then, while considering a tail in your mind, make a few long and straight lines. See, it is straightforward.

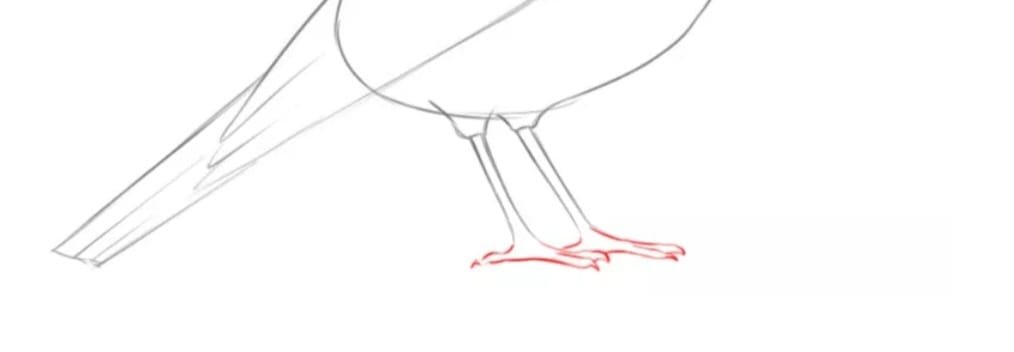
Step 7: Draw legs for the bird
Now, continue to draw the lower body. First, you have to sketch the upper part where the tiny legs are attached to the bird’s body. Then draw lines as tiny thin legs below.

Step 7: Draw nails
Draw the tiny fingers of a bird and draw some lines as nails, as shown in the picture.
Step 8: Final detailing
Take an eraser and erase all unwanted lines, plus draw some final details as needed to make it more precise and beautiful.
Step 9: Color the bird
With all of the drawing complete, you’re almost done! There’s just one last step, however, and that’s to add in some beautiful colors! You can choose to color your bird with paint, crayons, or other poster colors.

Tips
- Draw faint sketches so you won’t destroy the paper by rubbing it if you make a mistake.
- Well-sharpened your pencil before sketching.
- It is better when using a pencil than a pen so you can erase your mistakes.
- This bird is not designed to be a biologically accurate sketch.