
Give Your Beloved Leather Jacket a New Lease on Life: A Detailed Guide to Leather Painting
Is your trusty leather jacket feeling a bit same-old, same-old? The worn leather might whisper tales of adventures past, but the style might not be quite in line with your current vibe. Don’t relegate it to the back of your closet just yet! A splash of paint can be the perfect way to transform your old favorite into a conversation-starting masterpiece. This detailed guide will equip you with everything you need to know about painting leather, from choosing the right supplies to breathing life back into your jacket with stunning designs.
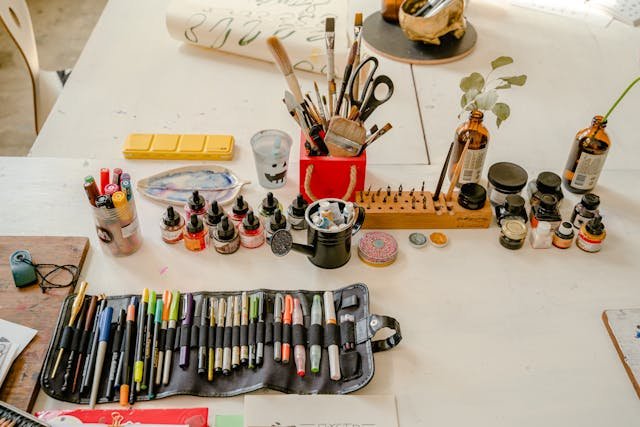
Paints and Prepping Essentials
Leather has a unique texture that requires specific paints for optimal results. Here’s what you’ll need to gather before you begin your artistic journey:
Paints
1. Acrylic Leather Paints
These are the gold standard for detailed leatherwork. Top brands like Angelus are formulated for excellent adhesion and flexibility on leather, ensuring your design doesn’t crack or peel over time.
2. Leather Dyes
If you’re looking for a more permanent color change or a rich base coat, leather dyes are a great option. They penetrate the leather for a vibrant, long-lasting effect.
Brushes
A variety of brushes will come in handy depending on your chosen technique. For detailed work and fine lines, opt for high-quality synthetic brushes with pointed tips. Flat brushes are perfect for covering larger areas.
Leather Deglazer
This is a crucial step in prepping your leather jacket for painting. Deglazer removes any oils or finishes that might prevent the paint from adhering properly. Most leatherwork suppliers carry deglazers specifically formulated for this purpose.
Leather Prep
Leather conditioner helps to soften the leather and improve paint flexibility. Look for a conditioner designed for use with acrylic paints.
Stencils (Optional)
If you’re a beginner or have a specific design in mind, stencils are a fantastic way to achieve crisp, clean lines. You can find pre-made stencils online or create your own using stencil plastic.
Fabric Spray Paint (Optional)
For covering large areas or creating faded effects, consider using specifically formulated fabric spray paints. Remember, regular spray paint is not suitable for leather and will likely crack or peel.
Other Supplies
Painter’s tape, sponges (for stenciling), gloves, drop cloths, and a well-ventilated workspace are all essential for a smooth painting experience.
Painting Techniques You Can Use To Paint A Leather Jacket
Now that you have your arsenal of supplies, let’s delve into the different techniques you can use to transform your leather jacket:
Stenciling
A fantastic option for beginners or those who want a clean, precise design. Secure your stencil with fabric glue and dab the paint with a sponge for an even application. This technique works well for lettering, geometric shapes, or simple patterns.
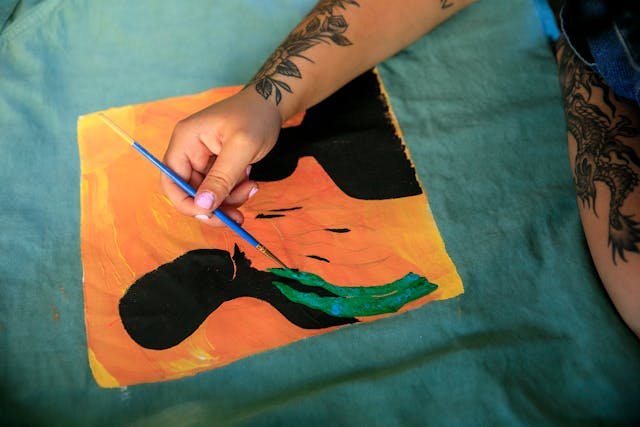
Freehand Painting
For the artistically inclined, unleash your inner artist and create a one-of-a-kind design! Use a variety of brushes to achieve different effects. Fine-pointed brushes allow for detailed work, while flat brushes are ideal for covering larger areas. Thinning your acrylic paint slightly with a leather paint conditioner will improve flow and prevent the paint from feeling stiff on the leather.
Spray Painting
This technique is well-suited for covering large sections of the jacket or creating faded color effects. It’s important to use specifically formulated fabric spray paints and hold the can at least 12 inches away from the leather for even coverage. Multiple light coats are better than one thick coat to avoid paint buildup and cracking.
Design Inspiration
Feeling stumped for design ideas? Here are a few suggestions to get your creative juices flowing:
- Graphic Statements: Bold geometric shapes, pop art designs, or even your favorite band logo can add a graphic punch to your jacket.
- Detailed Illustrations: Feeling fancy? Transform your jacket back into a work of art with a hand-painted floral design, a motorcycle scene, a personal symbol, or anything that speaks to your heart.
- Color Blocking: For a modern, minimalist look, block out sections of the jacket in contrasting colors. Play with unexpected color combinations for a truly unique statement piece.
- Patchwork Effect: Cut out interesting shapes from different colored leather scraps and use fabric glue to adhere them to your jacket. This technique is a great way to upcycle old leather garments or add a touch of texture.
The Painting Process: A Step-by-Step Transformation
1. Prepping Your Leather Canvas (24 Hours)
Begin by thoroughly cleaning your leather jacket with a damp cloth and a mild leather cleaner. Let it dry completely for at least 24 hours. Next, apply a deglazer with a clean rag, following the product instructions. Deglazer removes any oils or finishes that might impede paint adhesion. Tip: Test the deglazer on a hidden area of the jacket first to ensure compatibility.
2. Conditioning for Flexibility (1 Hour)
Once the leather is dry, apply a thin coat of leather conditioner using a clean cloth. This helps to soften the leather and improve the flexibility of the paint, preventing cracking. Allow the conditioner to dry completely for at least one hour before proceeding.
3. Design Transfer (Optional)
If you’re using a stencil, secure it to the desired location on the jacket with fabric glue. For freehand painting, lightly sketch your design onto the leather using a fabric pencil.
Tip: Use tracing paper to transfer a complex design if needed.
4. Base Coating (Optional, 2 Hours Drying Time per Coat)
If you’re opting for a solid base coat or a significant color change, leather dyes are a great option. Apply them in thin coats using a sponge or a brush specifically designed for dyes. For base coats with acrylic paints, thin the paint slightly with leather paint conditioner for better flow. Allow each coat to dry completely for at least 2 hours before adding another.
5. Painting Your Design (Varies by Technique)
- Stenciling: Dab the paint onto the stencil with a damp sponge, ensuring even application. Lift the stencil carefully once the paint is dry to the touch.
- Freehand Painting: Use a variety of brushes depending on the details in your design. Thin your acrylic paints slightly with a leather paint conditioner for optimal control. Work in thin layers, allowing each layer to dry completely before adding more. Tip: Start with lighter colors and gradually build up to darker shades for better control.
- Spray Painting: Hold the fabric spray paint at least 12 inches away from the leather and apply light, even coats. Multiple thin coats are better than one thick coat to avoid paint buildup and cracking.
6. Sealing the Deal (24 Hours Drying Time)
Once your masterpiece is complete and thoroughly dry, apply a leather finisher to protect the paint and make it water-resistant. Follow the product instructions for application and drying times.
Tip: Most leather finishers require at least 24 hours of drying time before the paint becomes fully cured.
Top Tips for Painting Success
- Practice on a scrap piece of leather first to get comfortable with the paint and your technique.
- Less is more! Start with thin coats and add more for better coverage.
- Patience is a virtue. Allow ample drying time between coats for optimal results.
- Embrace the imperfections! A touch of worn paint can add a unique, vintage vibe.
With a little planning and creativity, you can transform your beloved leather jacket into a one-of-a-kind piece that reflects your style. So grab your paints, unleash your inner artist, and breathe new life into your favorite leather companion!