
How to Draw a Car
One of the first things that most people learn to draw is a car. To construct a realistic car that is as intricate and personalised as you wish, build on these fundamental skills. You can use a reference photo, get ideas from a car you see on the road, or just picture the car you want to design! Draw a cartoon car to have fun and break up the realism. Draw a fun car quickly by exaggerating the characteristics and keeping the shapes straightforward.
1. Drawing a Realistic Car

1. Draw a thin rectangle
Draw a thin rectangle that is the desired length for the car. On your paper, lightly draw a long, narrow rectangle with a pointed pencil. Unless you want to draw the car in a two-point perspective, you don’t need to make the rectangle three-dimensional.
- Depending on how large you want your automobile drawing to be, the width of the rectangle will change.
- Since you’ll need to go back and delete some of these lines, don’t exert too much pressure when creating the major shapes for the car.
Tip:
Rotate the rectangle at an angle so that there are two vanishing points if you want to draw the car in two points of perspective. Draw the car in one point perspective so that it appears to be viewed from the side for a simpler drawing.
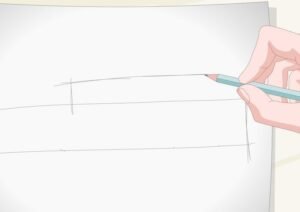
2. On top of the long rectangle
On top of the long rectangle, draw another rectangle. Since it will serve as the car’s cab, you are free to design it whatever big you desire. You can also choose whether you want it to be in the middle as if you were sketching a typical sedan, or at the back of the vehicle. The bottom rectangle and the top rectangle ought to be in contact.
- Pay attention to the car’s general shape. Make the top rectangles of some micro or compact automobiles large to give them a boxier appearance. Draw a rectangle that is less prominent and thinner to mimic the aerodynamic appearance of most sports cars.
- The cabs are frequently located closer to the rear of smaller automobiles like hatchbacks.

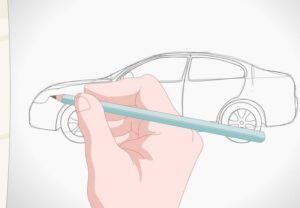
3. Over the rectangles
Over the rectangles, trace the body’s outline. Draw a faint outline of the automobile over the rectangles you created so they resemble the outline of the car to keep your car from seeming too boxy.
- From the rear bumper to the top of the cab and down the hood to the front bumper, try to make the car’s chassis appear seamless. You should be aware that some SUVs, trucks, and sports automobiles could have more acute angles.
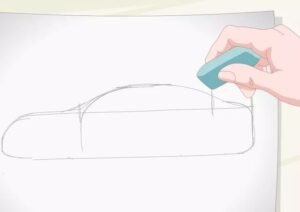
4. To give your car a curved body
To give your car a curved body, remove the sharp edges. Remove the hard corners to reveal your outline. By this point, your car should have a basic silhouette that matches its design.
- For instance, a sports vehicle will appear sleek and low to the ground whereas a hatchback will have a prominent curve projecting from the back.
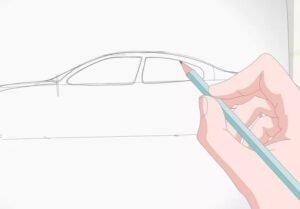
5. To make windows
To make windows, draw 2 curved rectangles inside the cab. Since most cars have two windows, you’ll need to outline both of them inside the cab. Then, divide the two windows by drawing a vertical line in the middle.
- Avoid creating the vertical line in the middle of a sports automobile since it might just have one thin window.

6. Give the windows
Give the windows and cab’s frame more finishing touches. To give the windows a more realistic appearance, add two thin vertical lines adjacent to the line you created for the window. The window’s back could also be curved where it joins the back frame. In this location, certain cars have a smaller, triangular window .
- Draw a fine line connecting the front of the frame with the front shape of the cab if you want portion of the windshield to be visible. This thin piece will resemble the windscreen.
7. Along the bottom of the huge rectangle
Along the bottom of the huge rectangle, draw two circles. To give the illusion that the wheels are attached to the frame, the bottom line of the rectangle should pass through each circle directly, roughly midway between its centre and bottom. Each wheel should have some space between it and the front or back of the vehicle. After that, add spokes or a hubcap to the centre of each wheel by going back and drawing them.
- Leave the bumpers that much room, or roughly half the diameter of a wheel.
8. At the front and back of the car’s body
At the front and back of the car’s body, add headlights and taillights. Create a curved oval or circle to serve as the headlights at the front of the car. After that, determine whether you want the rear tail lights to be rectangular or round as well. Given that they differ widely based on the type of car you are sketching, you are free to create the lights any size you wish. Place the tail lights so that they are facing the top corner at the front and back edges of the vehicle.
- Some tail lights include a larger rectangle inside a series of smaller ones. Yours can be as intricate as you like.

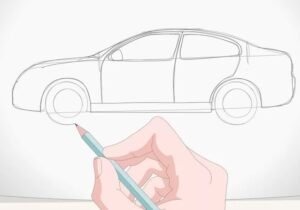
9. Fill in details that are unique to the car
Fill in details that are unique to the car. Decide if you’d like your car to have bumpers near each of the wheels. You can also draw distinctive side-view mirrors. These usually look like ovals where the corner of the window meets the front of the frame. If you’d like your car to have stripes or decals, sketch them along the side of the car’s body.
- Create a vertical line that indicates the location of the doors to give your illustration more realism. On each door, you should also draw a handle.
- Make your automobile look sportier, for instance, by applying a crisp zigzag decal across the doors.

10. Remove extra lines from your drawing
Remove extra lines from your drawing, and you are welcome to add colour. Retract the lines you drew over or smoothed out on your car. Your car will appear more professional as a result. Then, if you want to make the car bright, use coloured pencils or markers to fill it in.
Finished.
That was the easy way to draw a car.
Read Also: How To Say Shut Up In Spanish