
How to remove hair extensions?
Adding hair extensions to your hair can transform it. However, when it’s time for them to emerge, they can cause more anxiety than happiness. You should get a professional to remove your hair extensions. The purpose of this is to prevent harm or damage to your natural hair, which may occur if someone unfamiliar with the task at hand removes your extensions and causes damage. We are aware that this isn’t always feasible, though. Although it isn’t advised, you might take your extensions out at home if life gets busy or we lose track of time. And there is complete process on how to remove hair extensions in this article.
1: CONSULT YOURSTYLIST FOR HAIREXTENSIONS
A professional should be hired to remove hair extensions. So, before doing it yourself, talk to the hairstylist who originally installed the hair. If they are unable to set up an appointment for you, they will undoubtedly be able to give you one or two tips on how to do it securely on your own.
2: TAKING OFF TAPE-IN HAIREXTENSIONS
Luckily, tape-in extensions can be the simplest to take out. A comb and bond remover are all you’ll need. To take off the tape-in hair extensions, follow these instructions;
- The bond remover should be applied on the tape and massaged in. When the tape starts to budge, you may peel the extension off and slide it away.
- Avoid pulling too firmly when peeling as this will harm the natural hair to which the extension is affixed. Simply massage in more bond remover, add another drop if you feel any pressure, and peel once more.
- Another suggestion is to use the tail of your comb to glide between the tape’s two sides in order to further loosen the extension.
- You might still have tape and adhesive crumbs in your hair. Apply more drops and massage till they come out as well. Don’t worry, the remover is absolutely safe for your natural hair.
- Because of your normal hair development cycle, stray hair strands may gather at the roots. So, after the extensions and any leftover material have been taken out, comb your hair from the bottom up, starting at the roots. Don’t be concerned about the number of hairs that gather when combing your strands through because it’s typical to shed between 50 and 100 hairs per day.
STEPS TO TAKING OUT BONDED EXTENSIONS
It is also feasible to remove bonded hair extensions at home, though it could require a little more effort. You only need:
- Bond remover
- A little tooth comb
- Hair extension pliers
Before beginning, make sure your hair is totally dry. We don’t want the bonds to become harder by being wet, of course!
- Apply a few drops of the bond remover after separating the attached hair extension from the nearby hair. Massage the connection with this.
- Next, take hold of your hair extension pliers and tighten the bond. Put pressure on it until it decomposes into smaller bits. The extension should simply slide out after it is broken.
- Next, take hold of your hair extension pliers and tighten the bond. Once it starts to split into smaller pieces, apply pressure. The extension should simply slide out after it is broken.
- It’s crucial to only squeeze the bond with the pliers; otherwise, you risk injuring your natural hair. Therefore, it is advisable that you find an additional pair of hands to assist you if at all possible, particularly with the bindings towards the back of your head that can be a little more challenging to see.
- When all the ties have been broken and the extensions have been taken out, comb your hair with a fine tooth comb to make sure there is nothing left behind, including any loose hair.
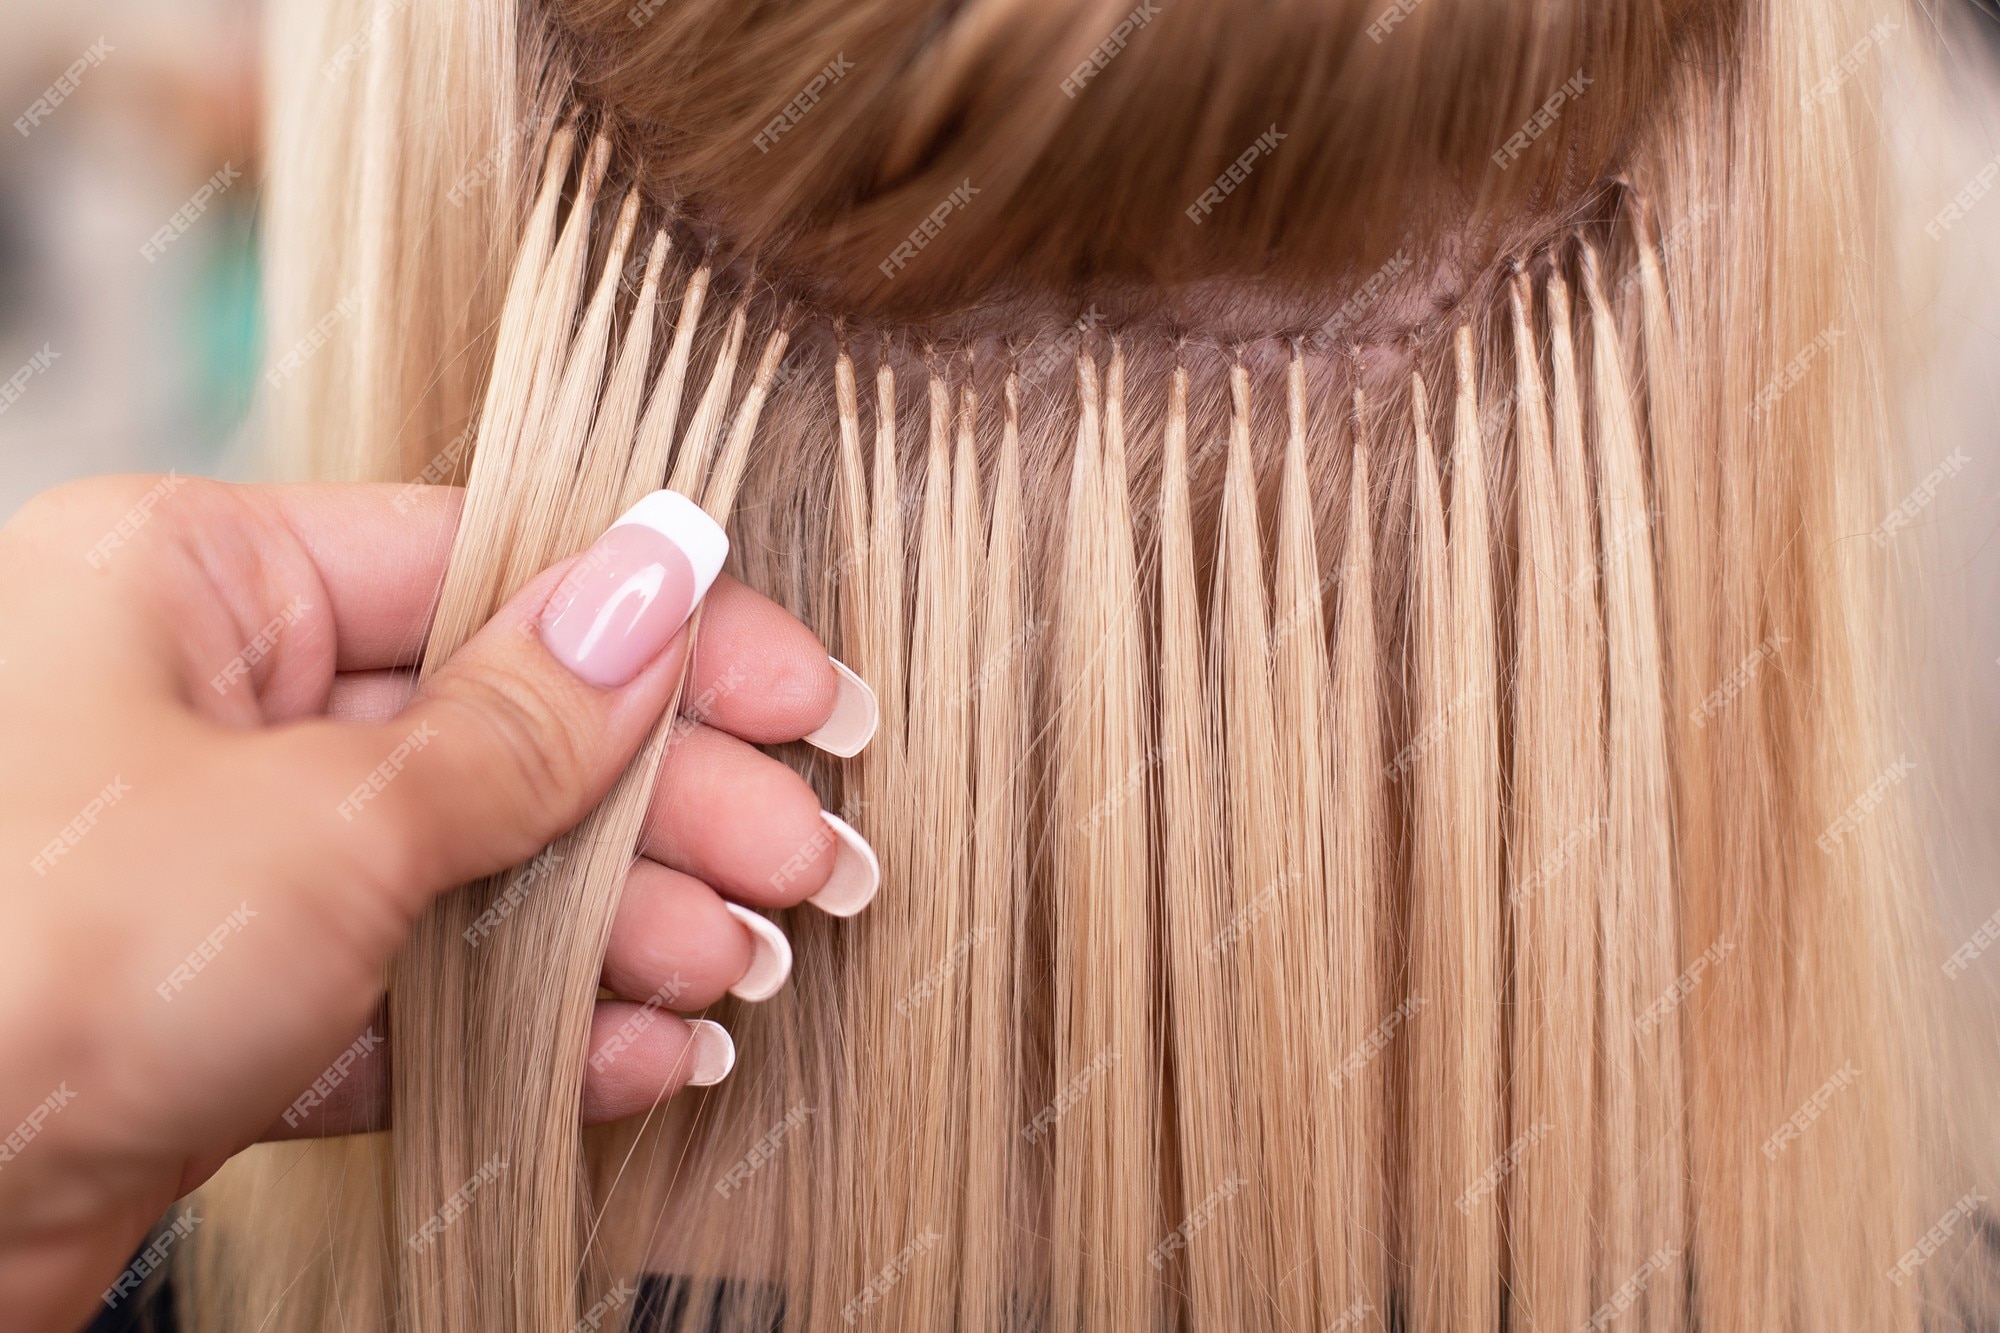
TAKING OFF MICRORING EXTENSIONS
Once more, it can be a little difficult to remove these by yourself. However, if you simply cannot wait any longer, follow these instructions.
To start, you will require:
- End-to-tail comb
- Bobby pins
- Pliers for extending little rings
- Beginning with the extensions around your neck, proceed through and take each one out one at a time. The clips are helpful in this situation because they let you divide your hair into sections so you can really isolate each ring.
- Apply pressure on the ring with the pliers in the opposite direction from how it was flattened. As little pressure as you can use will help prevent harm to your natural hair. If a ring is more difficult to remove, use a little more pressure. Once freed up, the extension will simply slide out.
- You might see stray hair or product remnants where the ring was, which is quite normal. So that you may properly wash your hair later, gently brush these out with your comb first.
TAKING OFF WOVEN OR SEWED-IN EXTENSIONS
A second set of hands will unquestionably be need to assist you in taking out weave or sew-in extensions. Additionally, you’ll need:
- Scissors
- Clips
- Comb
- It’s ideal to start by clipping all of your natural hair out of the way as you’ll be using scissors and don’t want to accidentally cut it. Additionally, it is advised that hair be fully dry because this makes it simpler to tell your original hair from the extension.
- A braid on your head will be braided with the extension wefts joined by a thread. The secret is to cut the thread rather than the wefts. In fact, if you’re going to remove the extensions, strive to do so with as little damage as possible.
- In fact, make every effort to keep the extensions intact when removing them since you might be able to install them again in the future.
- Cut each thread you feel or see as you circle your head. The additional pair of hands is required since it is much more difficult to reach those in the back of the skull. If you’re alone, another option is to utilize a mirror. Just be cautious and take your time!
- You’ll only be left with the braids they were attached to after the weave has been completely removed. Gently untwist these braids, being careful not to strain or tug the hair as this could harm it. Don’t be surprised if this starts to fall out because your stylist may have even braided some stray synthetic hair into the braid.

TAKING CARE OF YOUR HAIR AFTER REMOVING HAIR EXTENSIONS
Following the removal of your extensions, aftercare is crucial for healing any accidental injuries. To maintain natural hair and encourage development is one of the reasons people get extensions inserted, but even this takes maintenance to maintain results.
Therefore, it is advised that you thoroughly cleanse your hair first to get rid of any residue left behind from the extensions or removal products.
After that, fix any breakage or damage brought on by the tension using a hair-repairing mask. Keratin-containing products are advantageous since they maintain hair looking thicker, smoother, and shinier while also strengthening it. It’s also a good time to stop using heat tools on your hair because they risk doing more harm. Instead, choose natural hair drying and styling techniques, low ponytails, and loose braids to reduce tension in your hair.