How to Curl Hair with a Curling Iron?
Even if you weren’t born with vibrant, lustrous, shiny curls, you could always persuade your hair to bounce up for a day or two. Curling irons are designed to create beach waves and curls in dry hair. From big to small, you can have whatever curls you want, depending on the curling iron. Let’s dive into an article, to learn how to curl your hair using a curling iron and a wand.
Tips to follow to curl with a curling iron
Blow dry your hair before curling:
Have you ever heard your hair sizzle when you iron it? That’s not a good thing. It happens when the hair is still slightly damp. It takes time to get started with a good blow-dry, but when you do it, you get salon results.
Prep your hair properly:
You can curl your hair without using hair styling products, but choosing a hair curling product to improve your hair type can give you much better results.
Apply a volumizing mousse or hairspray to thicken fine hair or a hair smoothing cream if you want to fight frizz on thick hair.
Don’t skip heat protectant:
Heat dries your hair and can destroy the integrity of your hair’s internal structure and even shorten the life of the beautiful color you’ve invested in at the salon. Every thermal hair styling tool packs a lot of heat and curling irons in direct contact with your hair. Therefore, the use of heat protectants is essential for hair health.
Practice with a curling iron in the off position:
In this way, you can avoid burns while practicing hair curling techniques. Once you’re comfortable, apply heat to curl your hair.
Don’t grab too much hair at a time:
If the section of hair is too thick, the curling iron will not be able to apply heat to the entire length of the hair, and the curl will flatten, so curling a lot of hair at once will have the opposite effect.
Avoid same-sized curls:
The current curls and beach waves trend is to create natural hair shapes without being too done. The secret to this wavy hairstyle is to vary the size and direction of the curling sections. To curl your hair, take several wide and thin areas—alternate movements towards and away from the face.
Make curls and skip the hair ends:
Modern wavy hair is not curled to the ends, and the movement focuses on the center of the hair strand. So, make curls and skip the strand’s end. But if you’re going for a more traditional, formal curled hairstyle, then twist each section to the tips.
Choose the right temperature for different curls:
By reducing the amount of ironing and being conscious of the speed, you can create better curls with less damage to your hair. 392°F is the maximum temperature used to prevent hair damage.
Plus, every hair type requires a different heat setting. Fine hairs require low temperature, while thick, coarse, or curly hair needs more heat to get the work done. One temperature does not fit all.

Clip set your curl till it cools off:
Clip your curls in place until they cool off. This sets the curls in place and ensures that curled shape lasts longer. If you don’t clip them, the weight of your hair and gravity pulls the curly part of your hair down, making them loose and not as curly or bouncy.
Choose the right-sized curling iron:
For short to medium-length hair, use a 1″ diameter shaft and for long hair or loose curls, choose the 1.25″ barrel.
How to Curl Your Hair with a traditional Curling Iron?
Hair curling tools and products:
- Curling iron with a clamp
- A heat protectant spray
- Curly hair spray
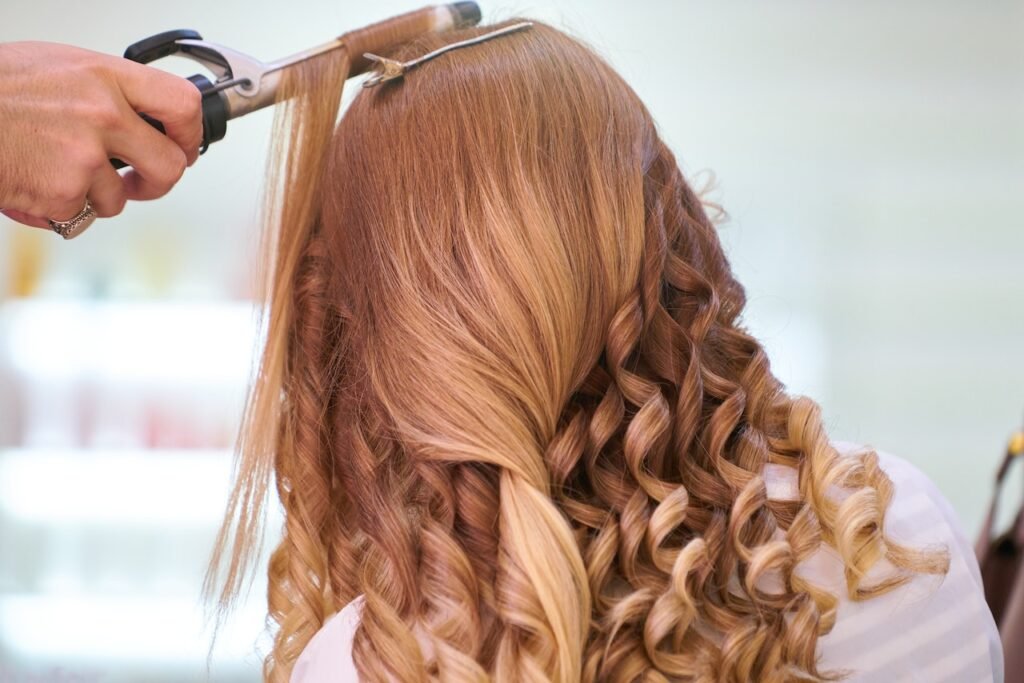
A traditional curling iron features a clamp that helps hold your hair in place as you curl.
Start With Freshly Washed Hair:
It’s a good idea to start with clean hair to get the most out of your perfectly curled look. Use shampoo and conditioner formulated to manage the appearance of frizz, and follow up by applying a hair mousse to add volume to your hair.
Blow dry your hair:
If your hair is wet or even a bit damp, it makes them more susceptible to hair damage. So air-dry your hair thoroughly before thumbing the switch on your curling iron.
Apply hair protectant to your hair:
It minimizes hair damage caused due to the heat emitted by styling equipment like curlers. It is applied to your hair before you start styling it.
Test heat of your curling iron:
First, find the right temperature setting for your hair and test it to see what kind of curl it produces. In this way, you can adjust the heat as needed before starting.
Section Your Hair:
Once you heat your curling iron, divide your hair into four parts. Re-divide them into smaller sections. Create sections that are slightly smaller in diameter than the curling iron. Use a lobster clip to hold them in place. Grab everything above your ears and clip it on your head.
Hold one strand of hair to curl:
- Now that all the prep work has been done, you’re ready to start curling. Begin by taking a small section of hair and wrapping it around the curling iron.
- Open the clamp and position the end of the hair at the lower end of the barrel, near the handle, then close the clamp to secure.
- Then you can wrap that entire section of hair by rolling the iron upwards toward your roots.
- Pin up the sections you have curled till they cool.

Shake the curls for final looks:
Remove the clips one by one. Run your fingers through the curls and give them a good shake for a soft and loose natural look. Finally, apply hair spray to hold your curls in place.
How to Curl Your Hair with a wand Curling Iron?
Hair curling tools and products:
- Wand curling iron
- White tissue
- A thermal heat spray to protect from heat damage.
- Curly hair spray
Curling irons have no clamps, and the hair is hand-wrapped and twisted around a hot barrel, then held in place with fingers. Because it curls the hair with less tension than a traditional curling iron, it creates looser, flatter curls and beachy waves.
Here is a guide to curling hair with a wand curling iron.
Blow dry your hair:
Dry your hair thoroughly using a hair dryer if they are wet.
Brush your hair:
Your curls won’t form correctly if your hair is entangled. So, brush your hair thoroughly.
Apply heat protectant:
Heat protection sprays add a protective layer to your hair to help protect it from the heat generated by styling tools. The spray locks moisture in hair and smooths hair cuticles.
Heat the wand curling iron:
Heat your curling iron to 320 degrees for fine hair, and for thick hair, 430 degrees. Test the temperature of the curling iron by pressing it against a white tissue paper. If the paper burns, the curling iron is too hot.
Separate your hair into sections:
Divide your hair into top and bottom halves, and split each to the left and right. Further, separate them into subsections about 2 to 3 inches wide.
Curl in smaller sections:
- If you want a looser wave curl, curl larger sections at once. If you want a tightly tousled look, curl with smaller parts of your hair.
- Hold the barrel of the curling wand so it is parallel to your head and your hand is above your head.
- Wrap the hair around the barrel.
- Hold the hair for 3 to 4 seconds before releasing the hair from the barrel.
- For a more natural effect, alternate the curl direction clockwise and counterclockwise.
Pin-up curls:
- Holding the bottom of the curl, compress the curl to create a perfect curl.
- Use a bobby pin to secure the circle of hair to your head to hold their shape while they cool.
- Continue until all of your hair is secured. Ensure the curls are cool off before you take off the clips.
Take out the pins and tousle the curls with your fingers:
Shake out the curls and fix any curls that look messy. For a more formal layout, tousle it with your fingers or tease it slightly. Tousling large curls is a splendid way to create wavy looks.

Apply Hairspray to finish:
It helps tame the frizz, adds definition to your curls, and keeps them protected without weighing them down. It helps you style your spirals the way you like and keeps them in place.
