
How to do zebra nail art design?
You may get a much-needed boost from the colour of your nails. Sick of the same old nail art? Get the animal out of you. You can make a print that will make everyone within a 1-kilometer radius envious of you with just two hues of nail polish. Chic zebra nails may be created by combining any other color with black for the stripes. Usually, white is used as the base, however, people have been spotted creating beautiful prints using black and hues like red and green. Women should certainly know how to apply this pattern to their nail tips if they hear rumors regarding animal nail art trends, notably the zebra style. Women apply nail polish to their feet as well as their hands to make their feet look finer. You only need to have the ideal color scheme to use in order to create a leopard and polka dot manicure design at home. “Explore creativity with zebra nail art! Learn how to do a stunning zebra nail art design at home with easy steps.”
What is zebra nail art?
Zebra style patterns are always evolving, and because of their distinctive styling, they are the most frequently sought for online. Additionally, the most popular internet search term is “prom nail design idea.”So, get your supplies and start painting. Follow the steps in this article below, which simplifies the procedure for you on how to do zebra nail art.
The required amount of time: 20 minutes
What you’ll need:
- Finish coat ( clear one)
- Nail polish in white
- Nail polish in black
- Painting tool
- To clean up any accidents, use nail polish remover
- A cotton bud
Procedure:
Let’s dive into creating a stylish zebra print nail design. Begin with a white base, opting for acrylic paint for better control and ease of use compared to nail polish. Grab tiny acrylic paint tubes from a craft store, dilute them with water, and use a small brush set for precision. Don’t worry if your brush strays; the forgiving nature of the design allows flexibility. While coffee may be your creative companion, it’s wise to limit consumption for intricate nail art. The advantage of acrylic paint lies in its easy removal from the skin, making this zebra print a user-friendly DIY nail project.
Steps to follow:
- Maintain good hand and nail hygiene. Using an old brush and soapy water, clean the nails.
- Use paper towels to dry your hands. Put on the last clear polish coat.
- The top coat should dry. The base coat in conventional polishes is white. Use two or three coats of white polish. You will need to wait until the first layer is completely dry before applying the second.
- Once the white polish has dried, dip the paintbrush in the black varnish and begin creating zebra stripes on your nails. To get the zebra look, leave some lines blank. Keep a zebra print nearby for assistance.
- Reapply the base coat. Use a cotton bud to dab nail polish remover on any smudges on the tips and edges of your nails.
- It’s not necessary for the base colour to be white. Any other colour, such as the green or any other color might be used. Pink and black look stunning together. Try out different colour combinations to create your own standout one.
Another Method of Applying Zebra Nail Art
Zebra-print nails in black and white
When it comes to the stripped design for nails, black and white is the most popular colour scheme, and ladies also favour it the most since it appears appropriate and respectable. Do you wish to get rid of your yellow nails, ladies? Let’s look at some possible solutions.
The most eye-catching pattern for nails is the zebra design. Apply black nail polish to your nails and apply glow-in-the-dark polish to create the zebra stripes for a glowing effect. Numerous additional styles are included below.

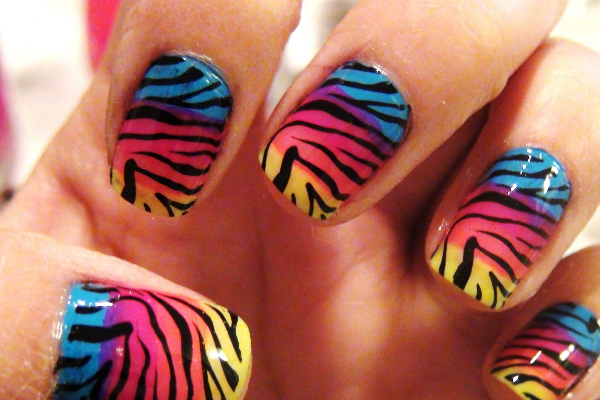
Various Colors Zebra Nail Art
Our team’s recommendation to you is to choose random colour patterns if you want something new and more eye-catching. Use any backdrop colour other than plain white or black as the default. Then pick any colour with a variety of opulent designs at random. This could assist you in changing your appearance and making an impression on other individuals.
Many women don’t think outside the box and use straightforward nail polish patterns, yet they are not happy with the nail artistry style they have chosen. Decide carefully and choose something novel.
Zebra nail art in gloss and matte:
Zebra-inspired matte and glossy nail art may be made by using either a matte black nail varnish as the base colour or a transparent matte-effect nail lacquer over a glossy black polish. Your base paint will turn matte after a short while as it dries. Using typical clear polish is not going to let you do this. Draw zebra designs with your remover and regular, lustrous black nail lacquer. Your design is complete at this point. We won’t use a top coat in this instance because doing so would destroy the design’s matte and glossy effects. Give it a shot.

3 Tones Zebra Design Set with OPI Glitter Polish and Stamping:
If you love glitter, this particular OPI glitter polish may offer your nails an excellent look. You’ll need this glitter polish, a light pink polish for the centre, and a matte white or off white paint. If you can’t find OPI glitter polish, you may also use loose nail art glitters on a transparent finish. For the zebra design, you will also require your stamping plates and black specialty polish. Ensure that you are mindful of the shape as you fill in with the three colours. Stamp the zebra pattern onto only the white paint to complete the process. An obvious top coat is now applied to complete the design.

Summary
Knowing the Zebra print patterns step by step with clear instructions as shown above will undoubtedly help you choose any stylistic trend for every situation within a range. Just keep in mind that practise is the secret to good nail art.
You will become a professional if you continue practising. We sincerely hope that you are pleased with these styles and are now fully aware of them.
How to know common mistakes of nail art and easy tips to fix them