
Volleyball is a sport with humble beginnings that has grown in popularity over the years.
Volleyballs may appear simple and easy to draw at first, but once you pick up a pencil and start drawing, you’ll realize they’re a little more difficult to capture on paper. But don’t worry, I’ll show you how to draw a volleyball step by step in this article.
1. Draw a Circle
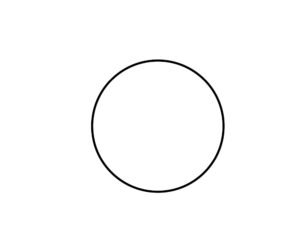
Draw a perfect circle using a protractor, a coin, or an old cd as a guide.
2. Draw Some Lines
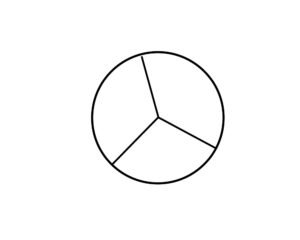
You’ll need a light pencil and a ruler for this part of your volleyball drawing. We won’t be using a pen or a dark pencil because the lines you draw will not be visible in the final image but will guide you in the next step.
You can divide the circle into three slices using your pencil and ruler, as shown in the reference image.
With these completed, we will proceed to the next step, where they will assist you with the following lines.
3. Begin drawing the ball’s seams
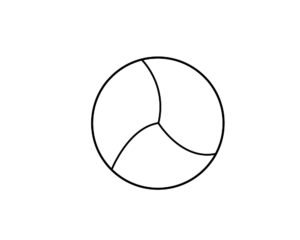
In this section of our volleyball drawing tutorial, we will draw some curved lines using the straight lines from the previous step.
Draw some slightly curved lines over the three lines starting from the center point created by them.
While these lines will curve in the middle, they will begin and end at the same points as straight lines.
Unlike the previous step, where you used a light pencil, you can use a pen or a dark pencil for this one, as these lines will be visible in the final image.
4. Continue drawing shoe seams
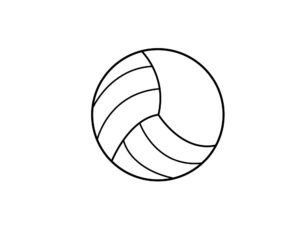
Let’s add some more seams to your volleyball in this step! You will begin this process by drawing some more curved lines.
These curved lines will be placed in the circle’s left-hand slices.’ As shown in the reference image, each one will have two curved lines running from side to side.
5. Now, draw the final seams
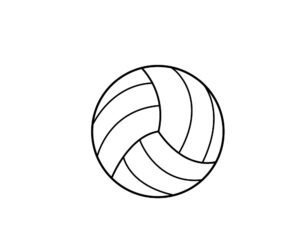
Before you begin coloring in this section of our guide on how to draw a volleyball, you can draw the final details. These will look like the lines you drew in the previous step.
The drawing will be completed with some more curved lines placed similarly to the previous ones from step 4. With those drawn, your drawing is nearly complete!
However, before proceeding to the final step, you could add some additional details of your own. Drawing on the logo of a volleyball brand that you might use in real life is one example.
You could even go a step further and draw a background for the image or have a hand reaching for it.
What kind of scene can you imagine drawing for this image?
6. Add some color to your volleyball drawing
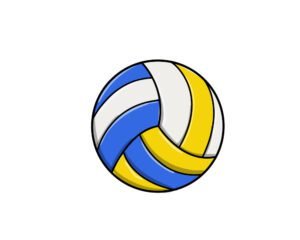
You’ll get to color in the final step of your volleyball drawing! Even though we have shown you one way to color in this image, this is the step where you can show us how creative you are!
Volleyballs come in a variety of color and pattern schemes, so use your favorite colors to express yourself in this step.
If you drew some background details or extra elements in the previous step, you can use your colors to finish them off.
You could even get in there with some minor details.
For example, you could use more precise art mediums such as colored pens or pencils to create weathering on the seams by using grey or brown on the lines.
You could, for example, use more precise art mediums like colored pens or pencils to create weathering on the seams by using grey or brown on the lines.
We can’t wait to see which colors, art mediums, and final details you use to complete your volleyball drawing!
Take your volleyball drawing to the next level by doing this
As we improve this volleyball sketch, create a great drawing of this iconic sport!
In order to play volleyball properly, you will need a court with a net. That also gives you a great idea for a background for this volleyball drawing!
You can easily begin building the background scene by adding the court and net markings.
If you need some assistance drawing the court, you can easily find images online to assist you as you draw.
Adding a background to a photograph always improves it!
Drawing the court and the net is one way to improve this volleyball drawing, but there are other options. You could, for example, draw some volleyball players using this ball.
This tip may complement the previous one. You could draw the characters in any style you want, and you could even just show a hand about to hit it.
Who would you base your characters on if you were to add some to this drawing? You could do it with your friends or even a professional volleyball team!
When it comes to selecting the best volleyball equipment, different brands and manufacturers are trusted by different players. You could add some details to this volleyball sketch to indicate the brand!
This could be as simple as drawing your favorite brand’s logo onto the stitching. It could also be entertaining to design your own volleyball logo!
Finally, you can experiment with different colors, art tools, and mediums to color your artwork. We showed you one color scheme to experiment with, but you can use any colors you want!
If you’re feeling particularly inventive, each section of the ball’s surface could be a different color.
Colored pens, markers, or brushes with thin tips would be ideal for this because they provide greater precision.
Your volleyball drawing is finished!
That brings us to the end of our volleyball drawing tutorial!
We hope that this guide demonstrated that, despite the complicated seam design of a volleyball, it is possible to make it much easier if you know what to do!
Our goal was to make learning easy and enjoyable for you, so we hope you enjoyed it.
Learning to draw a volleyball is only part of the fun, and now it’s your turn to show us what you’re capable of!
You can now customize your drawing by adding your own elements. You have a lot of options, from adding extra details to the volleyball to creating a fun background for the drawing.
You also have a lot of color options, and you can experiment with different mediums for different color styles.
However, the fun does not stop here, and we hope that you will return to our site frequently to enjoy the drawing guides that we will be uploading on a regular basis!
Must Read: How To Play Freeze Dance